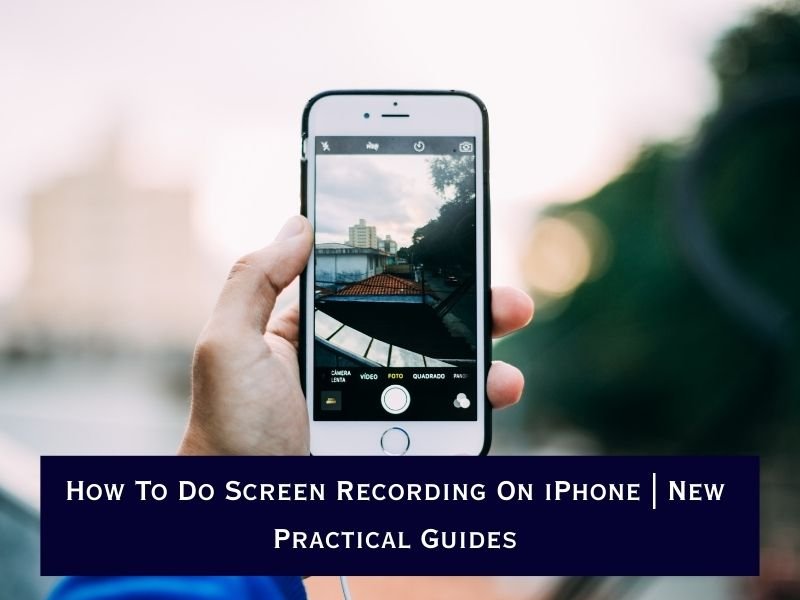
Quick Answer: To do screen recording on iPhone, open Settings > Control Center and add Screen Recording. Swipe down to open Control Center, tap the recording button, and wait for the 3-second countdown. To record with sound, long-press the icon and enable the microphone. The recording saves automatically in the Photos app.
Screen recording on your iPhone is one of the most useful features you may not use often—but once you learn it, it becomes a go-to tool. Whether you want to capture gameplay, create a step-by-step tutorial, record a video call, or quickly show a friend how to fix a phone setting, the iPhone has a built-in screen recording tool that makes the process simple and efficient.
Unlike older iOS versions, where you needed third-party apps, Apple now provides a native screen recorder directly in your iPhone’s Control Centre. This guide will show you how to do screen recording on iPhone step by step, including how to record with sound, how to edit your recordings, and how to troubleshoot common issues.
Importance of Screen Recording on iPhone?
Before diving into the steps, let’s understand why screen recording is so popular among iPhone users:
-
🎮 Gamers can record gameplay sessions and share them online.
-
🎓 Students and teachers use screen recording for tutorials and presentations.
-
📱 Tech support is easier when you can record and show what’s happening on your screen.
-
🎥 Content creators often use screen recording to make explainer videos, app reviews, or social media clips.
-
📞 Business users can record video meetings or demo apps for clients.
Simply put, screen recording is one of the most versatile iPhone features, and the best part—it’s built right in, with no downloads required.
Step-by-Step Guide to Screen Recording on iPhone
Let’s break down the process into simple, actionable steps.
Step 1: Enable Screen Recording in Control Centre
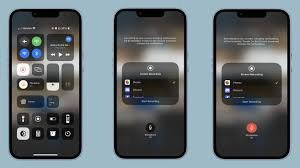
Before you start recording, you need to make sure the Screen Recording button is visible in your Control Center.
Here’s how:
-
Open the Settings app on your iPhone.
-
Scroll down and tap Control Centre.
-
Find Screen Recording under “More Controls.”
-
Tap the green plus (+) icon to add it.
Once added, you’ll see the Screen Recording icon (a circle-within-a-circle) in your Control Centre.
👉 Pro Tip: On iPhones with Face ID, swipe down from the top-right corner to access Control Centre. On iPhones with a Home button, swipe up from the bottom.
Step 2: Start a Screen Recording
Now that you’ve enabled it, starting a screen recording is straightforward:
-
Open Control Centre.
-
Tap the Screen Recording button.
-
You’ll see a 3-second countdown, after which the recording begins.
-
A red status bar or red clock appears at the top of the screen, showing that recording is active.
From this point, everything on your iPhone screen—including notifications, swipes, and app activity—will be recorded.
Step 3: Record With or Without Sound
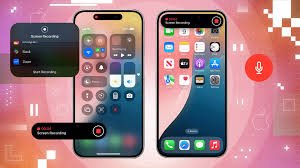
By default, the iPhone screen recorder captures system sounds (such as in-app music or video audio). However, it does not record your microphone voice unless you enable it.
To record with sound:
-
Open Control Centre.
-
Press and hold the Screen Recording button.
-
Tap the Microphone Audio button to turn it on.
-
Tap Start Recording.
Now your recording will include both the screen activity and your voice narration.
Use this feature when you’re making tutorials, app demos, or walkthroughs that require explanations.
Step 4: Stop a Screen Recording
When you’re done:
-
Tap the red status bar/clock at the top of the screen.
-
Select Stop when prompted.
Your video will automatically save to the Photos app. From there, you can watch, edit, and share it.
Step 5: Edit and Share Your Recording
The iPhone Photos app lets you trim, polish, and share your recording easily:
-
Open the Photos app.
-
Locate your recording in Recents or Albums > Screen Recordings.
-
Tap Edit (top-right corner).
-
Trim extra seconds at the start or end of your video.
-
Save changes.
Once edited, you can:
-
Share via Messages, WhatsApp, or AirDrop.
-
Save it to iCloud Drive or Google Drive for backup.
Troubleshooting Screen Recording on iPhone
Sometimes, you may run into issues. Here’s how to fix them:
1. Screen Recording Button Missing
-
Go to Settings > Control Centre.
-
Add Screen Recording again.
2. No Sound in Recordings
-
Ensure the microphone is enabled when starting the recording.
-
Check your iPhone’s silent mode switch—toggle it off.
3. Recording Not Saving
-
Make sure you have enough storage space.
-
Restart your iPhone and try again.
4. Some Apps Block Recording
Apps like Netflix, Disney+, and banking apps prevent screen recording for copyright and security reasons. Unfortunately, there’s no workaround for this—it’s intentional.
Advanced Tips for Screen Recording on iPhone
Want to get more out of your screen recording feature? Here are some advanced tips:
-
Use Do Not Disturb Mode: Prevents notifications from popping up in your video.
-
Record in Landscape Mode: Best for gaming or tutorials, especially for YouTube uploads.
-
External Audio Setup: Use an external mic for better voice quality while recording.
-
Editing Apps: After recording, polish your video using iMovie, CapCut, or Adobe Premiere Rush.
-
Combine Recordings: Stitch multiple clips together to create a longer video tutorial.
Screen Recording Across iOS Versions
-
iOS 11 and above: Apple first introduced built-in screen recording.
-
iOS 13 and 14: Improved stability and added better microphone integration.
-
iOS 15 and later: Offers smoother recording and better integration with Photos and editing tools.
No matter what version you’re on (as long as it’s iOS 11+), screen recording works almost the same way.
Frequently Asked Questions
Can I screen record with sound on iPhone?
Yes! Long-press the Screen Recording icon in Control Centre and enable the microphone for external audio.
Where are screen recordings saved?
Recordings are saved in the Photos app under “Videos” or “All Photos.”
Can I screen record on older iPhones?
Yes, any iPhone running iOS 11 or later supports screen recording.
Are there third-party apps for screen recording?
While iOS’s built-in feature is sufficient, apps like AZ Screen Recorder or Go Record offer extra features like annotations.
Learning how to do screen recording on iPhone is simple, and once you set it up, it becomes second nature. The venue for screen recording is just your Control Centre—no apps, no downloads, just a few taps.
By enabling the feature, knowing how to toggle sound, and learning how to edit and share your recordings, you can capture everything from tutorials to gaming sessions with ease. Whether you’re a content creator, student, gamer, or casual iPhone user, screen recording is one of the most versatile tools iOS offers.
Now that you know how to screen record on iPhone, try it today—create your first recording, edit it, and share it with friends or on social media!

